How to create an event
Once you have configured your account, including any account-wide default settings that can make your event creation more efficient, you can proceed to create an event in order to start accepting registrations and payments from your customers.
You can create an event from several areas in your account:
- On the Dashboard, the Upcoming Events section provides an option to Create Event.
- On the Dashboard, the primary dropdown navigation menu has an Events option, and selecting it provides an option to add a New Event (top-right corner).
You are then presented with an easy 5-step event creation process that allows you to configure various aspects of your event, along with other features, as follows:
- Step 1 — Main Details
- Step 2 — Pricing & Payment
- Step 3 — Description & Content
- Step 4 — Custom Form Fields
- Step 5 — Filters & Settings
- Adding an event cover image
- Publishing an event
- Other event actions
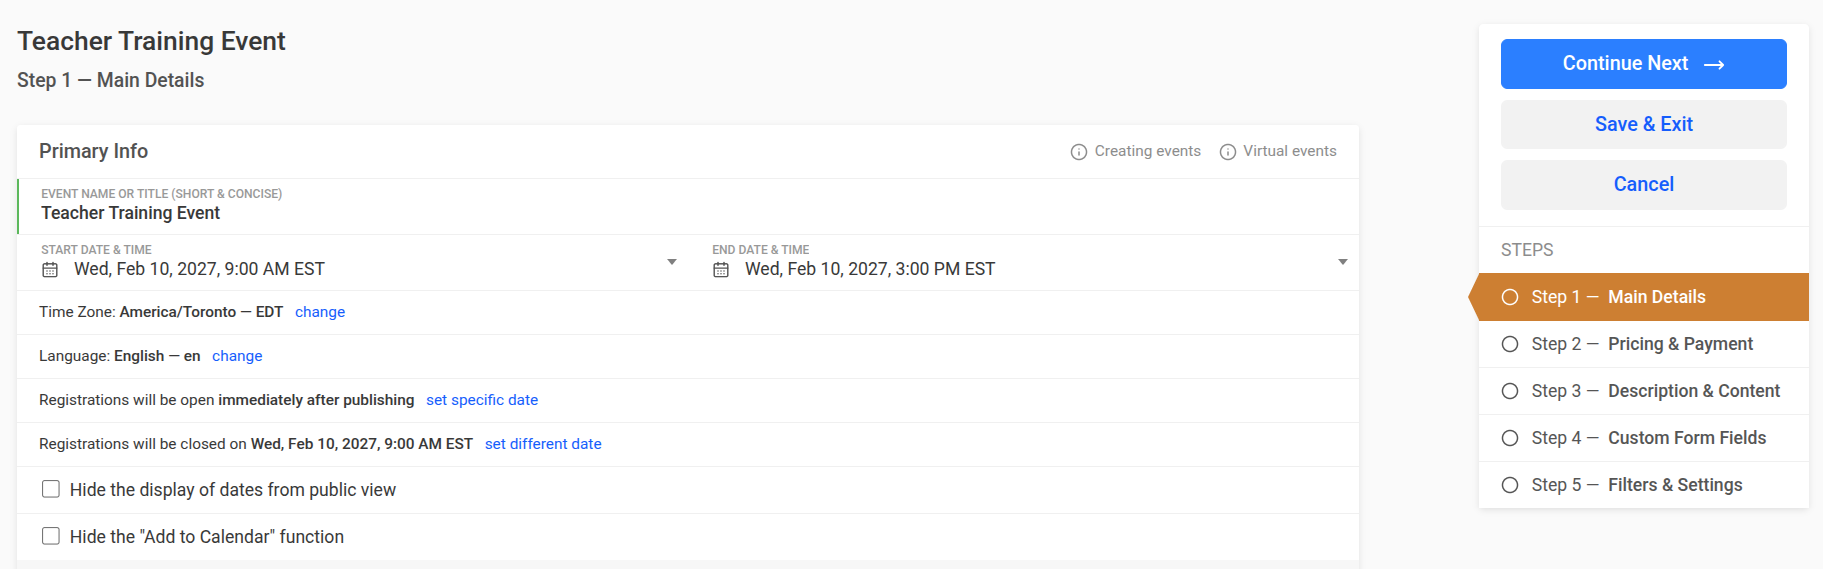
Step 1 — Main Details
- Event name or title, which is meant to be short and concise.
- Date and time for the start and end of the event (the end date must be within 365 days of the start date).
- Time zone, if different from the one you configured on your account.
- Event language, if different from the one you configured on your account.
- Registration open and close dates, if different from the defaults provided.
- Option to "Hide the display of dates from public view" if you do not want your audience to see any dates on the event.
- Option to "Hide the "Add to Calendar" function" if you do not want your audience to see or use the add-to-calendar feature.
- Breakdown of event dates and times, if not consecutive, and applicable to your event.
- Contact Info, if different from the one you configured on your account.
- Instructors selected for the event, which you would add and manage in the Instructors section of your account.
- Location for the event, which you can select from what you configured in your Account Settings or add a new one instantly, including online virtual locations.
- Display options:
- "Hide event from portal site" — this option allows you to hide the event from your public auto-generated event portal site. The event will still be publicly accessible when it is published, but it will not be listed on your event portal site. This is helpful when you only want to share the direct link to the public event page or registration form.
- "Hide event from calendar view" — this option allows you to hide the event from the calendar view on your event portal site, while still having it show up as part of your portal site. This is helpful when the event spans a long period of time and may impede the display of other events in the calendar view.
- Option to provide the "Virtual Meeting Link & Info" if your event is online.
When you have finished this step, Continue Next or choose another step of the event creation. If you are leaving the event creation area, click Save & Exit to keep your changes. If you did not make any changes, click on the Cancel button.
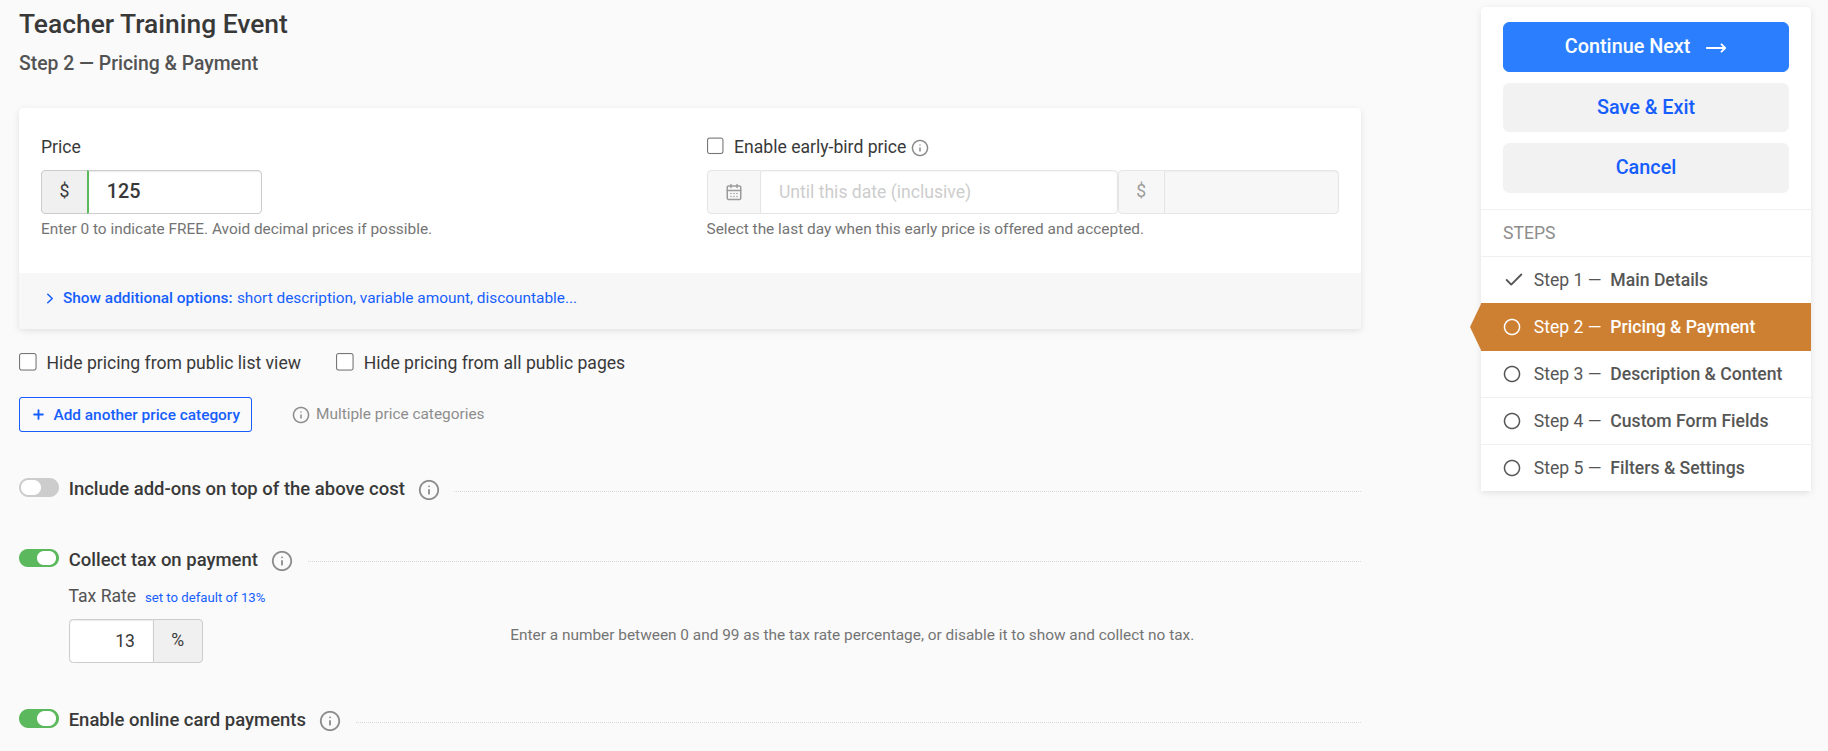
Step 2 — Pricing & Payment
- Price of your event; it can be a fixed or variable amount, and you would use the value of 0 to indicate a free event
- Early-bird price, if applicable
- Multiple price categories, if applicable
- Add-ons for the event, on top of the registration cost, if applicable
- Taxes, if you need to charge taxes on the event
- Online payments, if you will be accepting online card payments
- Offline payments, if you will be accepting offline payments
- Online deposit payments, if you will be accepting a deposit or partial payment
- Pending payments automatic email reminders, if applicable
- Coupon discounts, if applicable
- Volume or bulk discounts, if applicable
When you have finished this step, Continue Next or choose another step of the event creation. If you are leaving the event creation area, click Save & Exit to keep your changes. If you did not make any changes, click on the Cancel button.
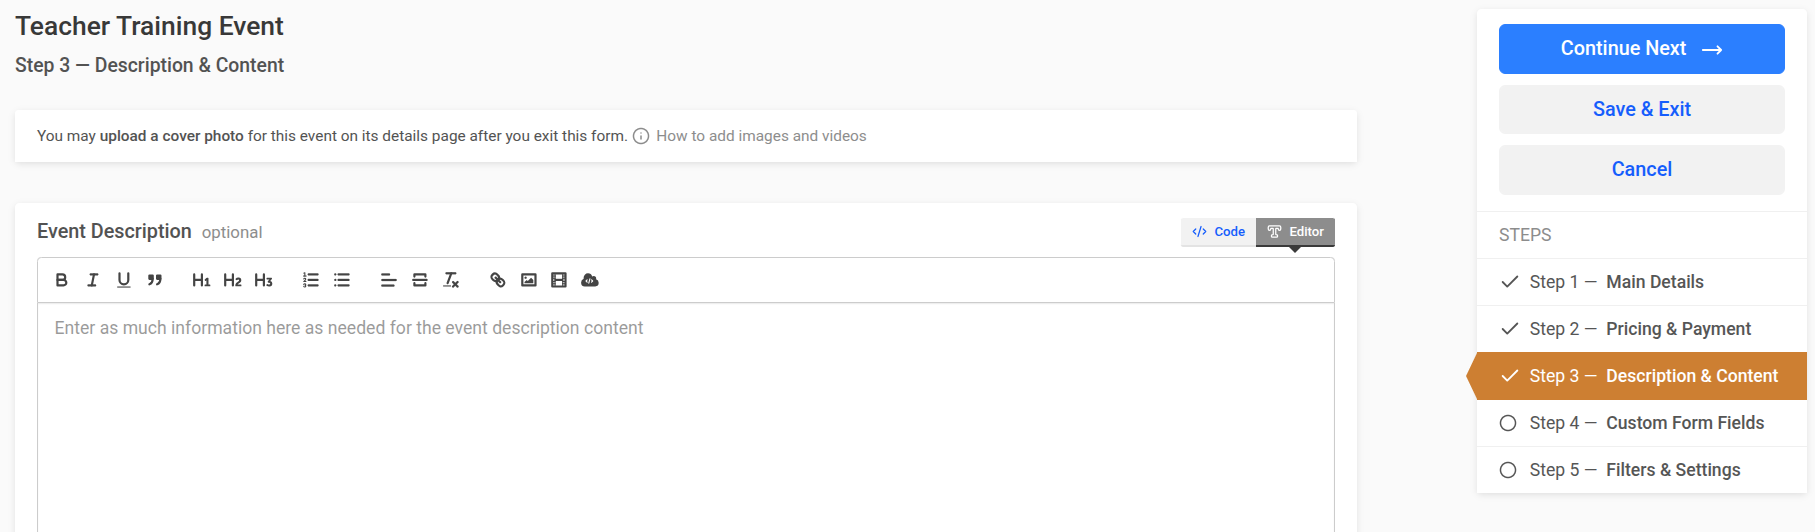
Step 3 — Description & Content
When you have finished this step, Continue Next or choose another step of the event creation. If you are leaving the event creation area, click Save & Exit to keep your changes. If you did not make any changes, click on the Cancel button.
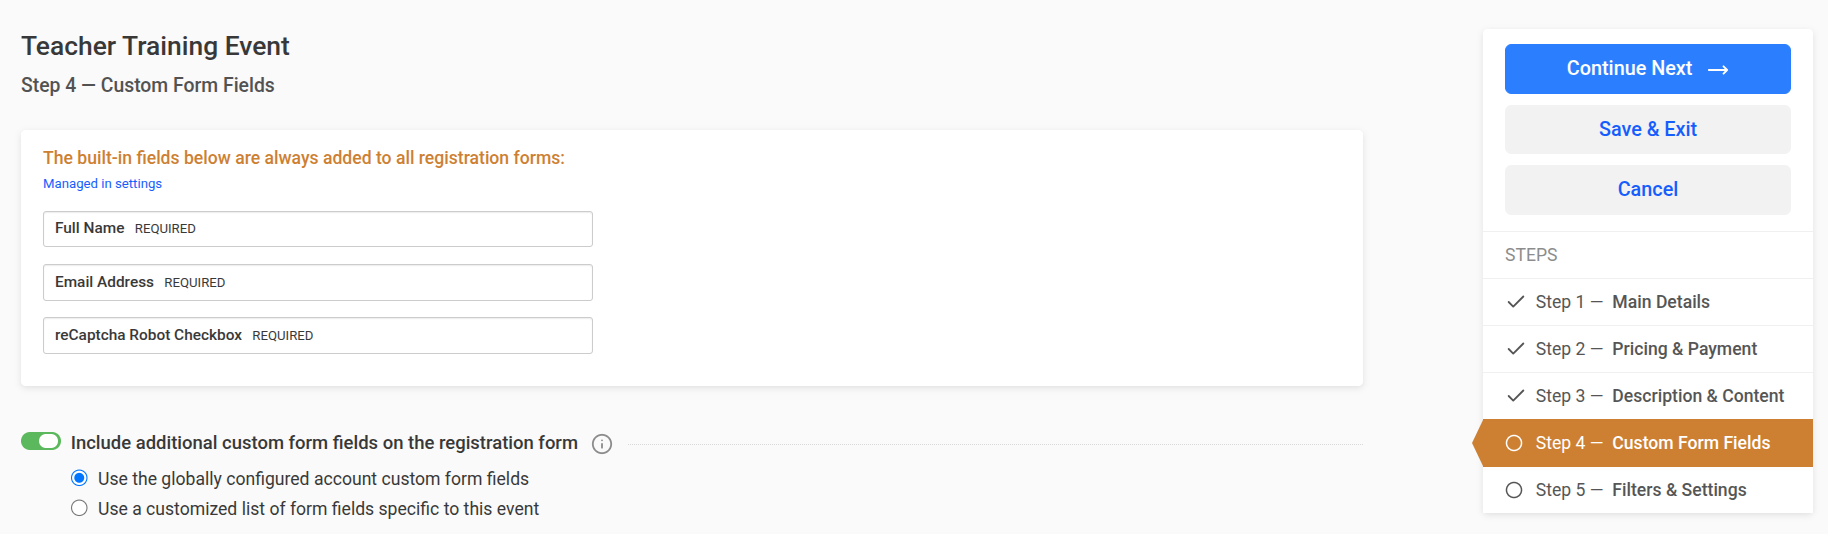
Step 4 — Custom Form Fields
- The built-in attendee Full Name and Email Address are required by default.
- A phone number, physical address, and a note field are optional. These are built-in fields that you can quickly enable or disable for the entire account by going to your account Settings, then Configurations, and then Form Fields.
When you have finished this step, Continue Next or choose another step of the event creation. If you are leaving the event creation area, click Save & Exit to keep your changes. If you did not make any changes, click on the Cancel button.
TIP — Aim to collect as little information as possible from your attendees on event registration forms. First, it creates shorter, simpler registration forms that are quicker, easier, and more likely to be completed. Second, it respects and protects their personal information from unnecessary exposure.
Step 5 — Filters & Settings
- Assign the event filters. It is recommended that you configure the Categories, Age Groups, Genders, and Levels filters for the entire account during your initial account setup, before creating events. The filters you assign will enable you (internally) and your attendees (publicly) to quickly and easily locate the most appropriate event for them.
- Limit the number of spots available, if applicable.
- Enable waiting list registrations when the event is full, if applicable.
- Restrict who can register for this event, if applicable.
- Send automatic email reminders to all attendees at some time prior to the start date, if desired. You can select from several timeframes in hours, days, or weeks.
- Send feedback requests automatically by email to all attendees, if desired.
- Receive notification emails for every new registration, payment, or feedback submission. You can choose more than one recipient, and it is useful to enable this if you want to stay informed about your event registrations by email.
- Include a custom email communication message to be included within the default receipt and reminder emails, or use the account-wide custom email message(s) that you configured, if desired.
- Enable access to the attendee self-serve page for event registrations, if desired.
- Allow duplicate registrations with the same name and email address, if desired. By default, the system prevents duplicate registrations for the same event unless you enable this setting. A duplicate occurs when the exact "full name" and "email address" combination matches a current registration for the same event. It will prevent accidental duplicate registrations, and it is recommended to keep this option off.
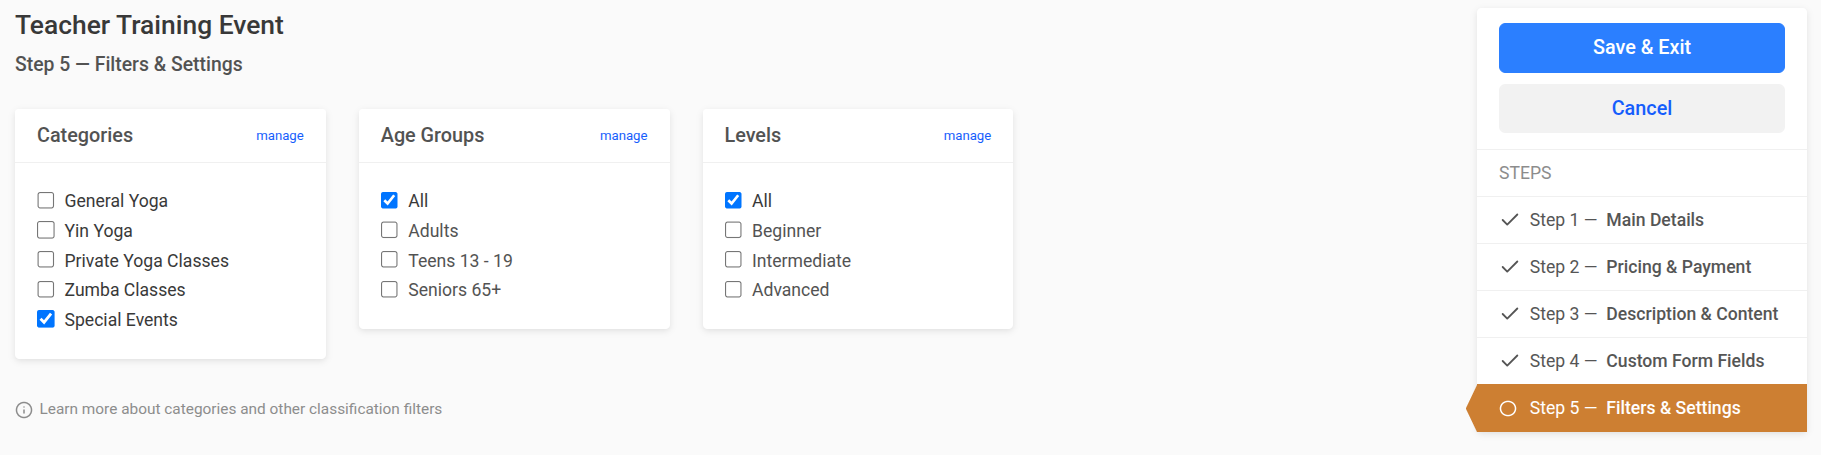
When you have finished with this final step, click Save & Exit.
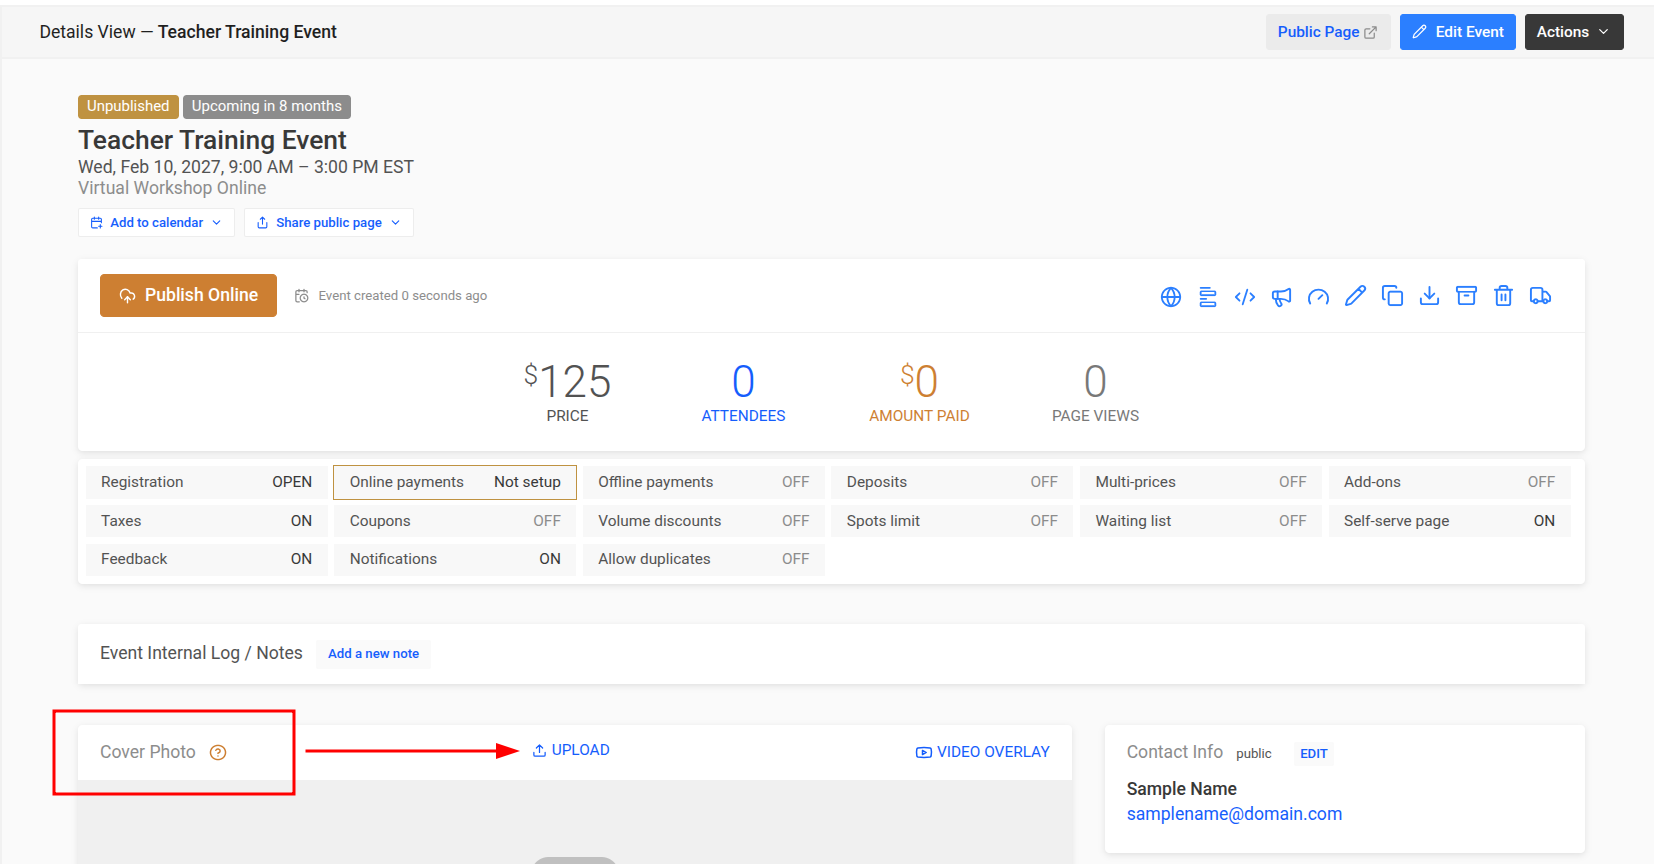
Adding an event cover image
- To add a cover image, use the Upload option and select the image file from your computer.
- To add a cover video, use the Video Overlay option and paste the HTML video embed code from YouTube, Vimeo, or a similar service that supports an IFRAME format. If you are using a YouTube video, you can just paste the video's URL (web address).
Please see the help doc about adding images and videos to event pages for more details, to view some cover photo and video tips, and to learn how cover photos are displayed.
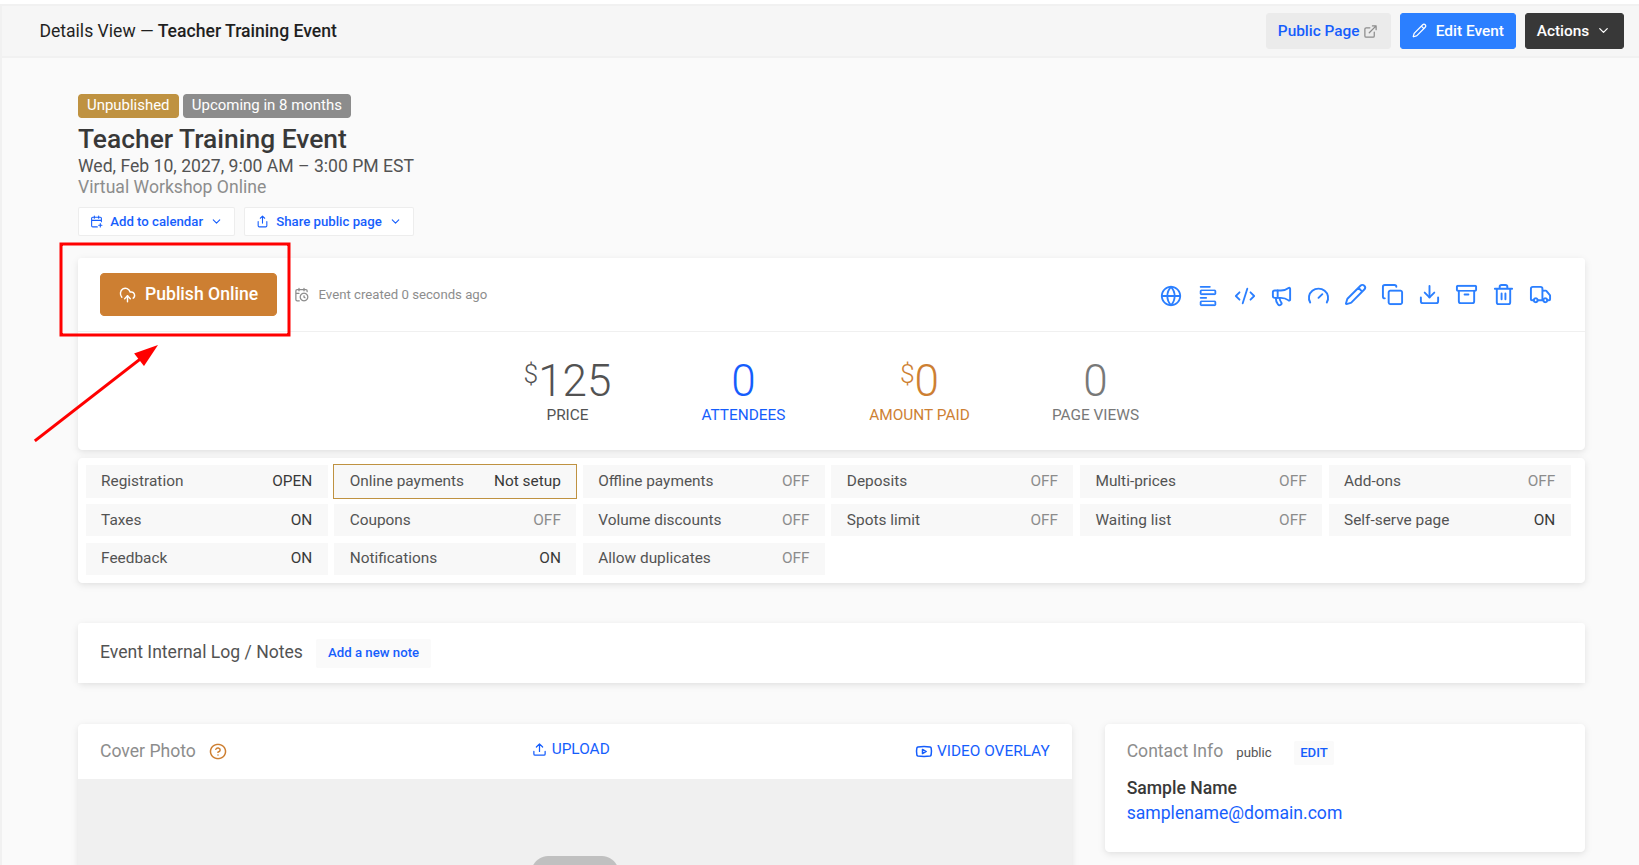
Publishing an event
After completing steps one through five and adding an optional cover image, you can publish your event when you are ready to make it publicly accessible. You can publish it right away or hold off until a later time.
Publishing an event makes your event page and registration form publicly accessible to anyone with whom you share the generated public event URL, and it will appear on the auto-generated portal site for your account if the event is current or upcoming. For more information, refer to the help doc on Event discoverability on search engines.
Other event actions
After you set up the event, the Event Details page and other areas of the account display an icon toolbar for each event. This provides you with quick access to perform additional features related to the event, as follows:

- View the online published page. You can also preview the event page in draft mode before you publish it.
- View the registration form. You can also preview the direct registration form in draft mode before you publish the event.
- Sharing & Embed Codes. This is where you will find the links and embed codes for the event, which you can use to market and promote on your website, on your social media, and other applicable outlets.
- Memos. This is where you can create memos to be sent to registered attendees in this event with any important information related to the specific event.
- Report. This is where you can view the event's detailed stats and financial reports.
- Edit. This is where you can edit the event configuration within any one of the five steps.
- Clone. This is where you can clone the event to quickly and easily make more like it using the configurations you set for this one.
- Export. This is where you can export the attendee data for this event in either PDF or CSV format.
- Archive. This is how you can archive the event if you don't need to see it in your Events list, which will also make it unpublished.
- Delete. This is how you can delete the event if you no longer want it and will not need to refer to it in the future. This will permanently delete all of its data, including any registrations that were associated with it, and is not recoverable.
- Move. This is how you can move the event if you have another Corsizio account within the same user login and need to move events between them.
Aside from this icon toolbar, you can also access most of these features on the left side menu and the Actions menu on the Event Details page.
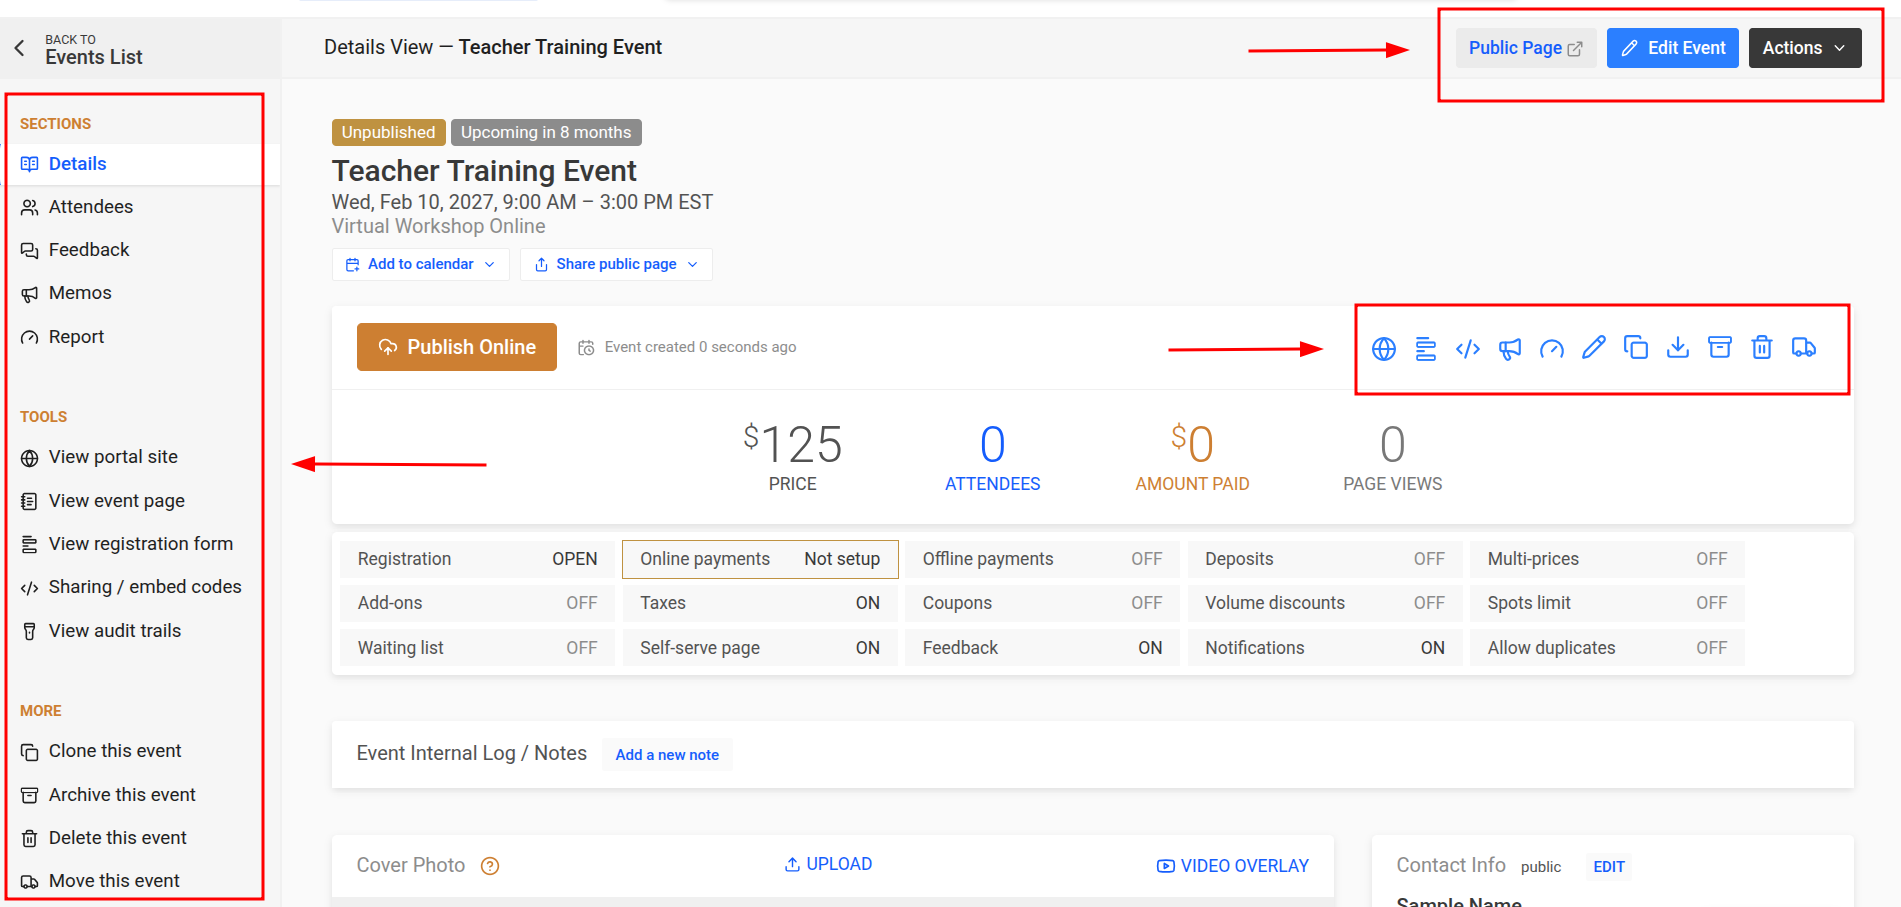
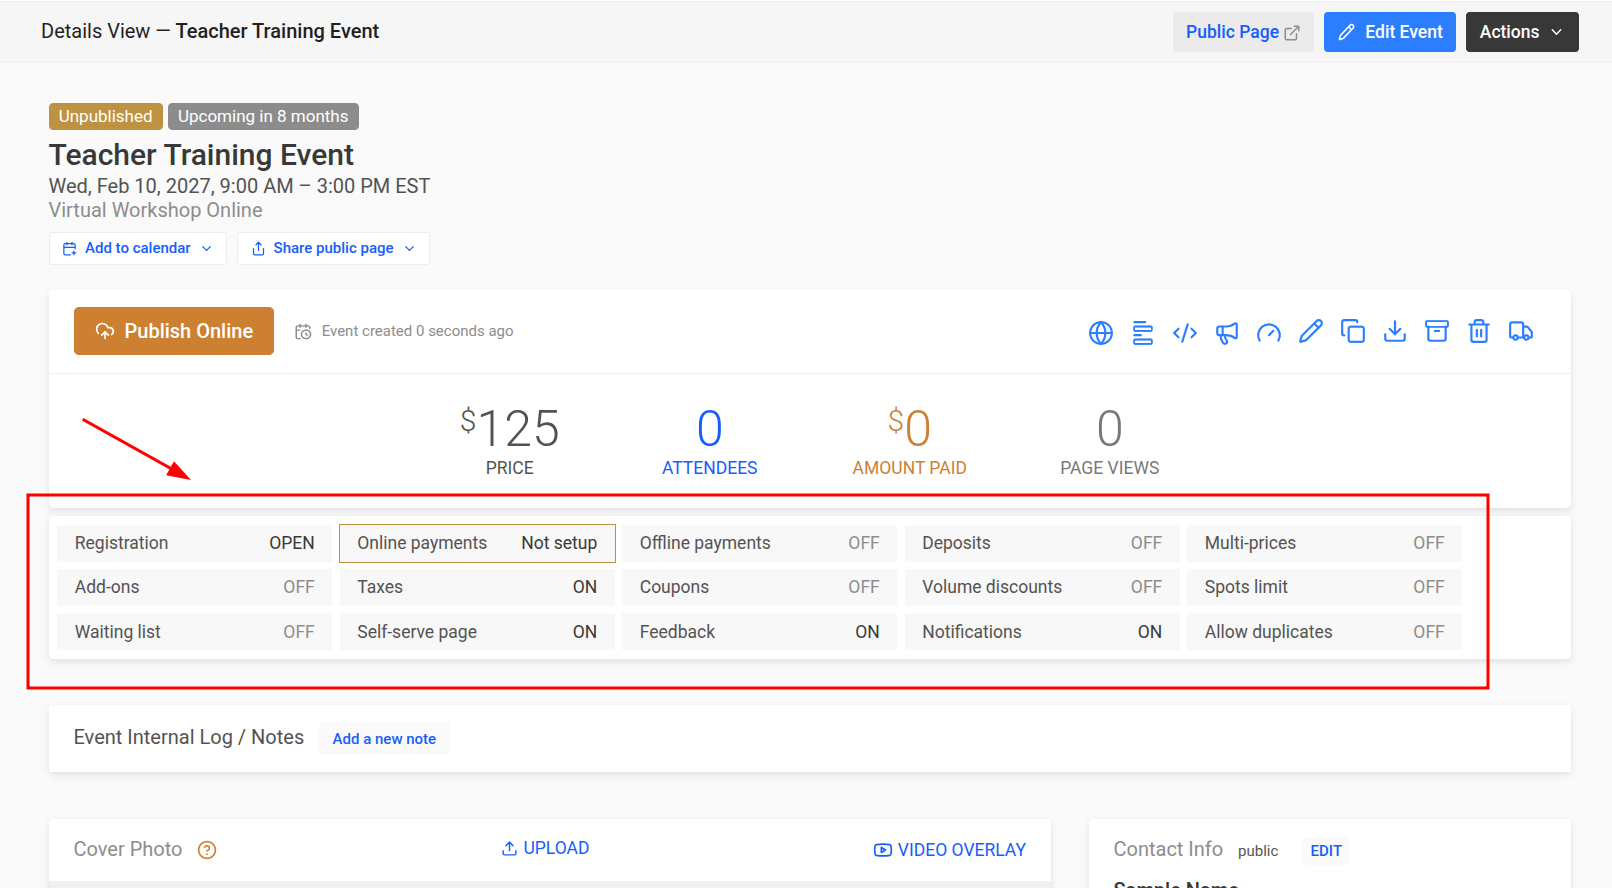
On the Event Details page, you are also provided with the status of the most common event features, so you can see at a glance what you enabled or disabled on the event. You can also select any one of these to modify it, which will take you to its corresponding configuration area in the 5-step event creation process.
After you create your event, you can edit it anytime, whether it is published or unpublished, as long as it is not an old event that has already passed.